If you’ve ever struggled with adjusting image sizes inside Photoshop, one of the most common tasks you’ll face is learning how to resize a layer in Photoshop. This skill is fundamental whether you’re a beginner editing your first photo, a designer preparing social media graphics, or a professional editor resizing product images for eCommerce. The ability to resize layers smoothly makes your workflow faster, cleaner, and much more professional.
Photoshop layers are like transparent sheets stacked on top of one another. Each layer might contain an object, text, or adjustment—and resizing them ensures your final composition looks balanced. Whether you’re working on Windows or Mac, the process is simple but must be understood properly.
In this guide, you’ll not only learn step-by-step how to resize a layer in Photoshop but also master essential resizing tools, shortcuts, scaling options, and advanced tips. Plus, I’ll cover real-world outsourcing costs of resizing and editing in the USA vs Bangladesh, so you can make smarter business decisions.
Table of Contents
Step-by-Step: How to Resize a Layer in Photoshop
Here’s the complete workflow:
Step 1: Open Your Project
-
Open Photoshop.
-
Go to File > Open and select your image.
-
Your image will appear as the background layer by default.
Step 2: Unlock the Background Layer (Optional)
-
If you need to resize the background itself, click the lock icon in the Layers Panel to unlock it.
-
On Mac, use Command+J (Windows: Ctrl+J) to duplicate the background so you keep the original safe.
Step 3: Select the Layer You Want to Resize
-
Go to the Layers Panel on the right-hand side.
-
Click the specific layer you want to resize (text, shape, object, or image).
Step 4: Activate Free Transform Tool
-
On Windows: Press Ctrl+T
-
On Mac: Press Command+T
-
This activates the Free Transform Box around your layer.
Step 5: Resize Proportionally
-
Hold Shift while dragging the corners to keep proportions intact.
-
Drag inward to make smaller or outward to make bigger.
-
For non-proportional scaling, release Shift and drag freely (not recommended for product images).
Step 6: Confirm Changes
-
On Windows: Press Enter.
-
On Mac: Press Return.
-
Your resized layer is now set.
Advanced Resizing Tools in Photoshop
-
Transform Menu
-
Go to Edit > Transform
-
Choose from options like Scale, Skew, Distort, and Perspective for creative resizing.
-
-
Smart Objects
-
Convert your layer into a Smart Object before resizing.
-
This prevents pixel loss even after multiple resizes.
-
Right-click the layer → Convert to Smart Object.
-
-
Content-Aware Scaling
-
Found under Edit > Content-Aware Scale.
-
This helps resize images without distorting the main subject (great for portraits).
-
Outsourcing Cost: USA vs Bangladesh
Resizing layers might sound easy, but for bulk product photos or detailed commercial work, outsourcing is often the smarter choice. Here’s a breakdown:
-
USA Freelancers & Agencies
-
Average price: $3–$8 per image
-
Bulk discounts may lower it slightly, but still expensive for eCommerce stores with thousands of photos.
-
-
Bangladesh Editing Studios
-
Average price: $0.25–$0.80 per image
-
Specialized companies deliver 24-hour turnaround with professional Photoshop experts.
-
Perfect for clipping path, resizing, and advanced color correction.
-
👉 Conclusion: Outsourcing to Bangladesh is 70–90% cheaper without sacrificing quality, making it the global hub for Photoshop services.
Why Resizing Layers Properly Matters
-
Product Photography: Resized product images look consistent on eCommerce websites.
-
Social Media Graphics: Optimized dimensions prevent awkward cropping on Facebook, Instagram, or LinkedIn.
-
Web Optimization: Proper resizing reduces file size, improves loading speed, and boosts SEO ranking.
More Blog : How to Rotate an Image in Photoshop
Here is real example
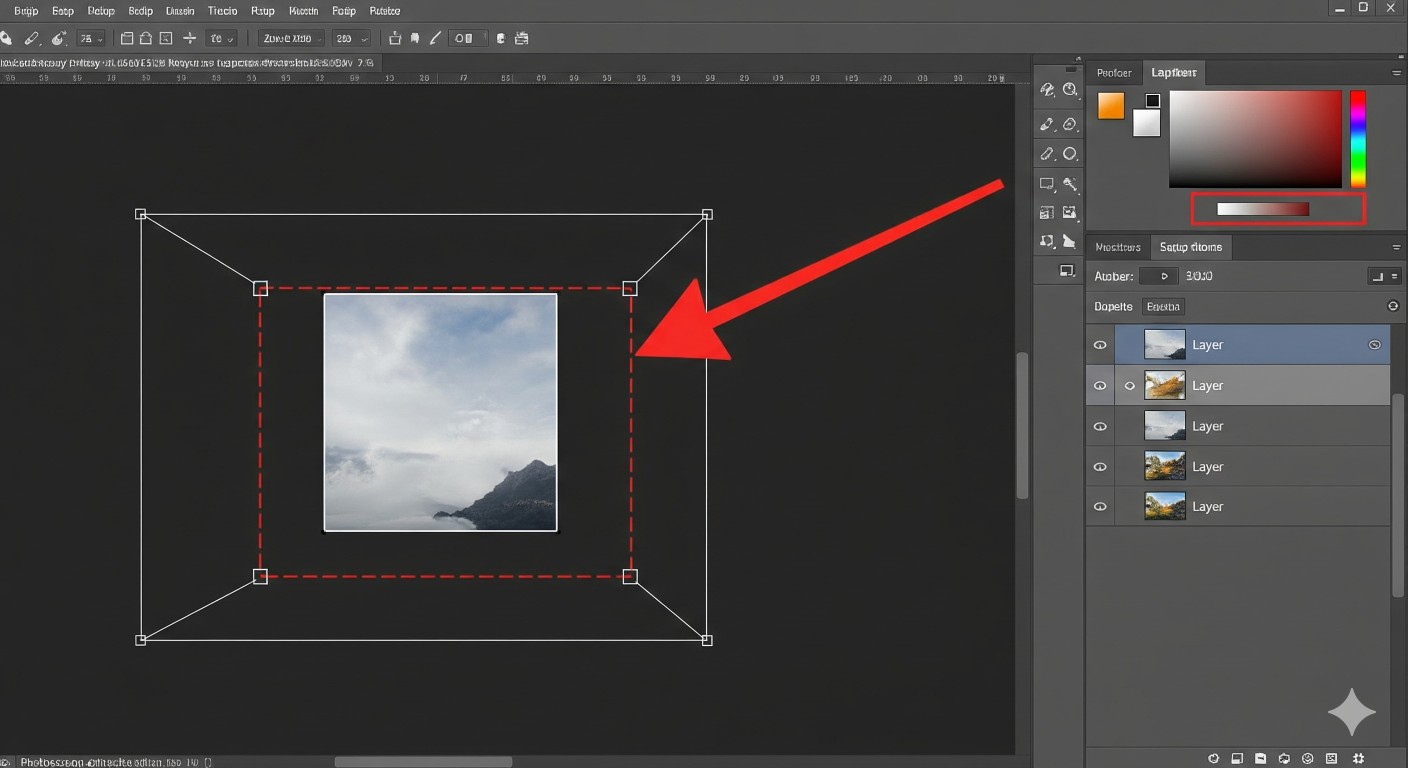
To resize a layer in Photoshop, you can use the Free Transform tool. Here are the general steps, and below is an image that visually highlights the process.
- Select the Layer: In the Layers panel, click on the layer you want to resize.
- Activate Free Transform: Go to Edit > Free Transform in the menu bar, or use the keyboard shortcut Ctrl + T (Windows) or Cmd + T (Mac). This will place a bounding box with handles around your layer.
- Resize: Click and drag one of the corner handles to resize the layer. To maintain the aspect ratio, hold down the Shift key while dragging.
- Confirm: Press Enter (Windows) or Return (Mac) to apply the transformation.
This image shows the Photoshop interface with a layer selected and the Free Transform bounding box visible. The red arrow highlights a corner handle, which is used to resize the layer
FAQs About How to Resize a Layer in Photoshop
Q1: How to resize a layer in Photoshop without losing quality?
Convert the layer into a Smart Object before resizing. This preserves quality even after multiple transformations.
Q2: What’s the shortcut to resize a layer?
On Windows: Ctrl+T, on Mac: Command+T. Hold Shift to maintain proportions.
Q3: Can I resize text layers?
Yes! Select the text layer → Press Ctrl+T (Cmd+T on Mac) → Drag to resize. For sharper results, keep text as vector-based Smart Objects.
Q4: How do I resize a layer to an exact size?
Use the Properties Panel (Window > Properties) and enter exact width/height values in pixels, inches, or percentages.
Q5: How much does outsourcing resizing cost?
In the USA, it ranges from $3–$8 per image. In Bangladesh, it’s as low as $0.25–$0.80 per image—ideal for bulk projects.
Conclusion
Learning how to resize a layer in Photoshop is one of the most essential skills for any designer, photographer, or business owner working with digital images. From social media graphics to product photography, resizing ensures every project looks professional, clean, and visually consistent.
By mastering the Free Transform tool, Smart Objects, and Content-Aware Scale, you can resize any layer without distorting it. Whether you’re on Windows or Mac, Photoshop gives you full control over how images scale.
And if you’re managing hundreds or thousands of images, outsourcing is the smartest choice. With editing costs significantly lower in Bangladesh compared to the USA, you save both time and money while still getting high-quality results.
👉 Master resizing today. Outsource when needed. And always let Photoshop layers work for you—not against you.