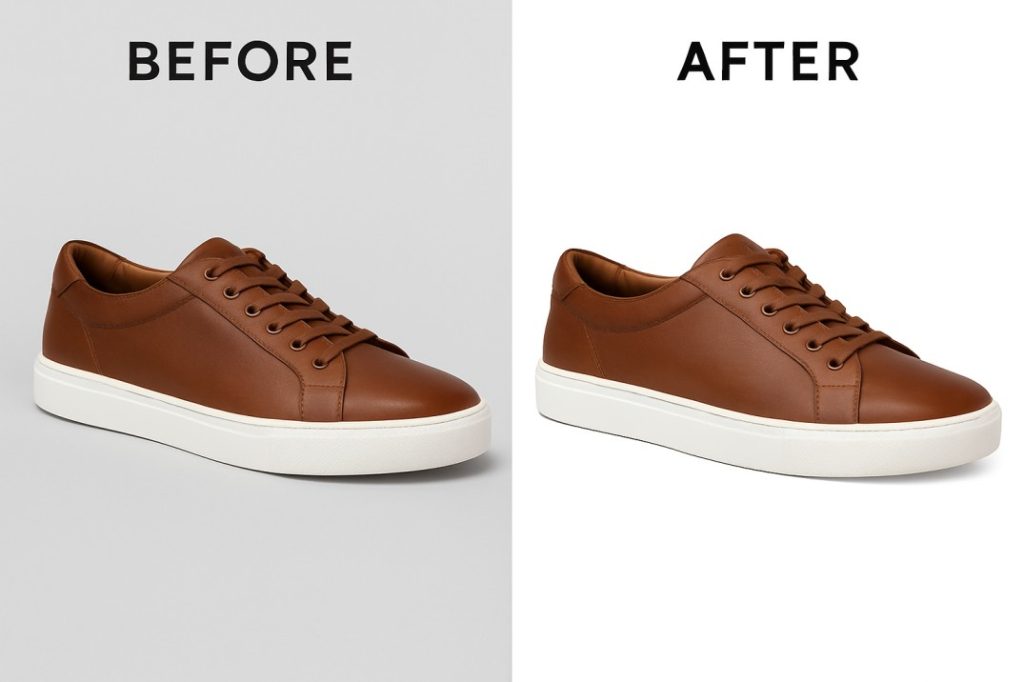
When a photographer takes a picture, it usually comes in his hands in a raw format. Initially, those photos are much larger in size. It’s a good idea to resize an image that is easily shared via the web or email. This can be easily achieved through Photoshop
It is very easy to resize a layer of an image with Photoshop but it also makes it extremely easy to reshape layers destructively. We will discuss how to do this in a few simple steps that will help you in your work. When you upload an image to the web or prepare it for printing, it’s important to have the right size.
Next, we’ll show you how to make it even bigger by using the photo crop tool with the Content-hour feature in Photoshop. this article will discuss eCommerce Photo editing top tools to help you resize your images for free online. You can use these resources to edit eCommerce photos in your store listings, blog images; social media profile images and posts, and more.
Note that you cannot use a single image on each online channel without resizing. Because Facebook, Instagram, and Twitter have different image dimensions that you should follow and try to adjust the image dimensions with these tools.
Table of Contents
How to resize a layer in Photoshop now we share simple tips
Here we will show you how to best resize a layer of Photoshop for the eCommerce product photo editing and retouching or any personal images.
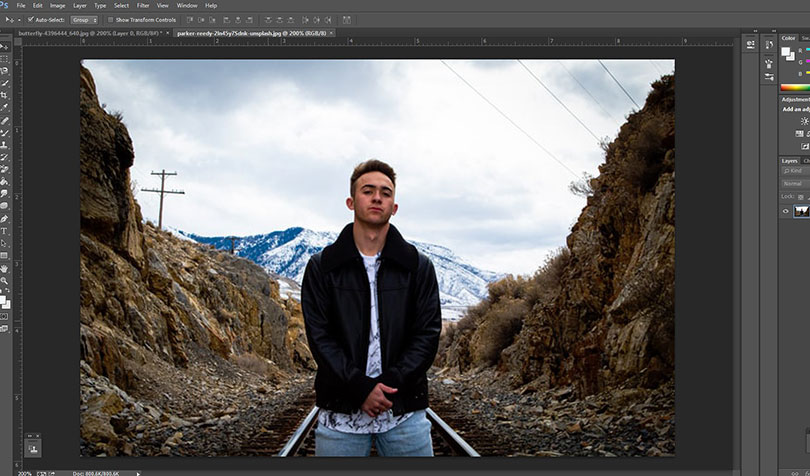
1. First, you select an image and click on the size you want to change.
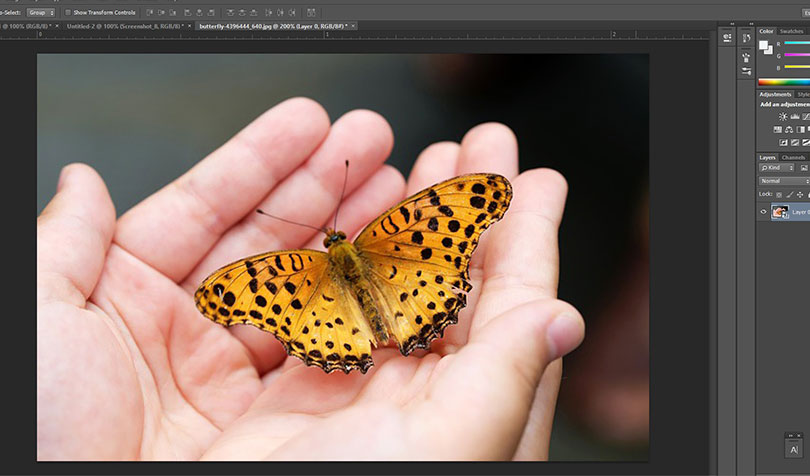
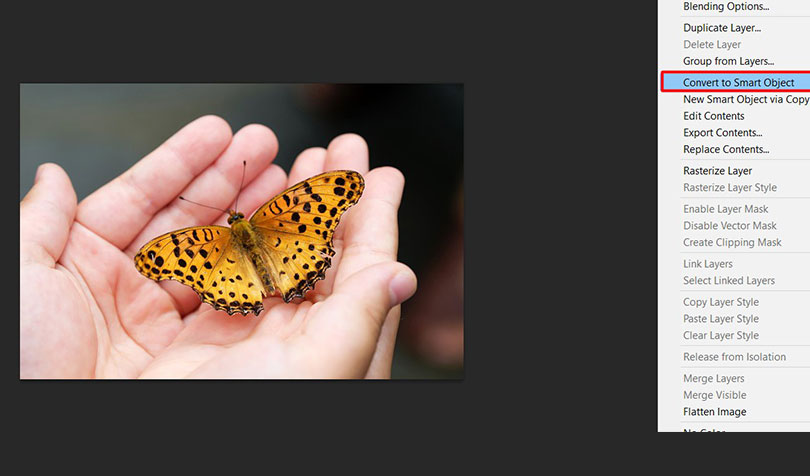
2. Now right-click your mouse, and select the Convert smart object.
3. Now you click Ctrl + T for the Transform tool.
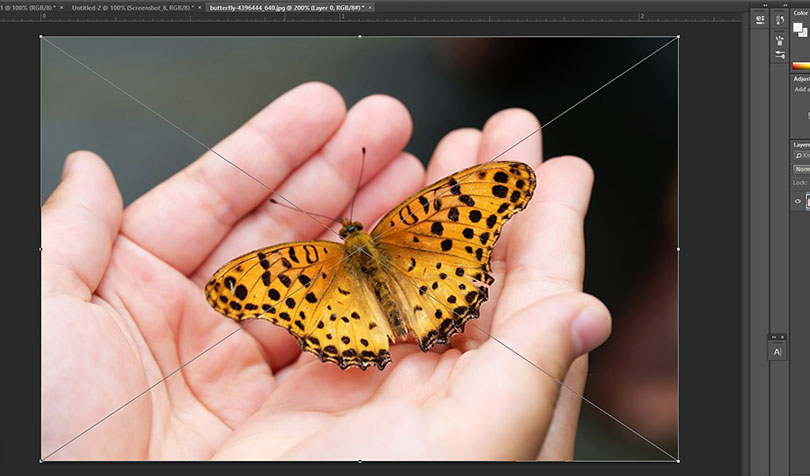
4. Now all you have to do is drag any of the handles in the image with your mouse and resize it to your liking. Then, press Enter or click the checkmark in the menu bar.
Here are some techniques to teach you how to resize a layer in Photoshop and how to use layers in the Layers panel, resize a layer of content, add images to layered files and work with a background layer in Adobe Photoshop. To learn how to resize a layer in Photoshop, you first need to know the basics of resizing a layer.
First, you need to know what layers are and why they are so useful
First, we will discuss how new layers are created.
To help you understand the process, we’re going to assume you don’t have an image with layers yet. Creating layers from scratch is much easier. First, go to the main files menu and click “New” to create a new image file. Note that a dialog box will appear asking you what dimensions you want for the new file. If you are not sure, enter a width/height of 600 pixels and click OK now.
You should now select a blank canvas that will serve as your “background” for the other layers. Now notice that to add a new layer, look for the layer at the bottom right corner of the screen and make sure the “Layers” tab is selected. In the Layers palette, you’ll see a list of whether you can enable your current layers, enable them, organize them, and more.
Below this palette, you will see a row of small icons. To create a new layer click on what looks like a dog’s ear page and you will see that a new layer has been created according to your needs.
Remember that how to resize a layer in Photoshop is a basic skill for any professional and non-professional designer. Now we share 5 Photoshop tutorials, advanced tips, and tricks on how to resize a layer in Photoshop.
1. First of all understand the layers

First, of all, you understand what you will learn from here in these Photoshop tutorials: To view and select layers in the Layers panel
- Layers contain images, text, or objects that create a layered file. They allow you to move, edit, and work content in one layer without affecting other levels of written content.
- The layers are arranged in a stack of panels, usually at the bottom right of the work area. Remember that if the Layers panel is not visible, select Window> Layers.
- In the Layers panel, click the icon to the left of a layer to hide the content of the layer. Click in the same place again to publish the content. It’s an effective way to remind yourself of what’s at a certain level.
- A layer must be selected to change this. In the Layers panel, right-click a layer name to select the layer. Hold down Control (Windows) or Command as you click the other layers to add more layers to your selection.
2. Send on Learn layer basics
Before resizing a layer in Photoshop tips and tricks you should know the basics of a layer. Because if your basics are strong, your advanced level will be easier to learn and understand.
First, change the layer order, now create a new layer, change the layer opacity and delete a layer. What you will learn from these Photoshop tutorials are what things are needed to work with the layers in Photoshop.
- Drag a layer above or below the Layers panel to change the order of the layered objects in your image.
- Now create a new layer so that a new layer is created at the bottom of the layer panel. Now click on the icon. This selected layer will remain transparent until something is added to it.
- To name a level, double-click the current level name. Type a new name for the level. Press Enter (Windows) or Return.
- To change the opacity of a layer, select a layer on the layer panel to make the layer even less transparent and drag the opacity slider located above the layer panel.
- Now to delete a layer, select a layer on that layer panel and delete by pressing Backspace.
3. Create Resize a layer
Now in the third step, the selected layers need to resize the content. Then you can learn how to resize a layer in Photoshop and create a resized layer.
To resize layers:
- Select one or more layers in the Layers panel in such a way that they contain images or objects that you can resize.
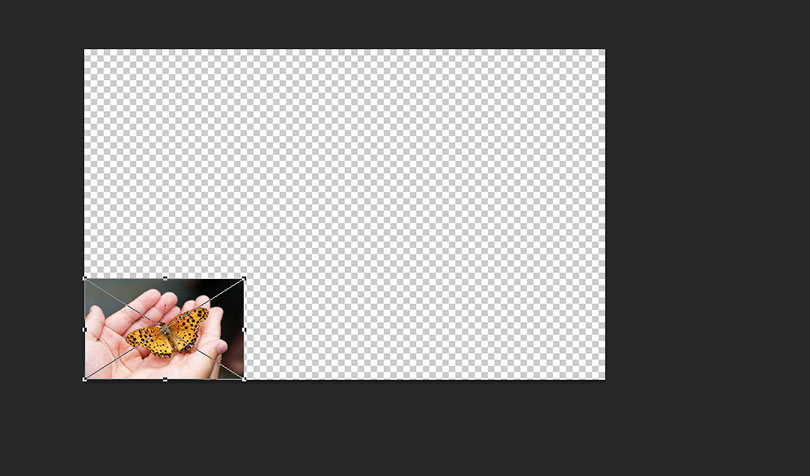
- Select Edit> Conversion for free. A conversion border appears around all the contents of the selected layers. Hold the shift key to avoid distortion in the content and pull the corners or edges until you like it. Drag within the conversion border to move the content around the image. Drag outside the conversion boundary to rotate the content.
- Click the checkmark in the options bar or press Enter (Windows) or Return to finalize the change.
4. Add images to a layered design
Four steps are added images to a layered design, most of the Clipping Path companies follow this step for better resizing an image and to add images to a design.
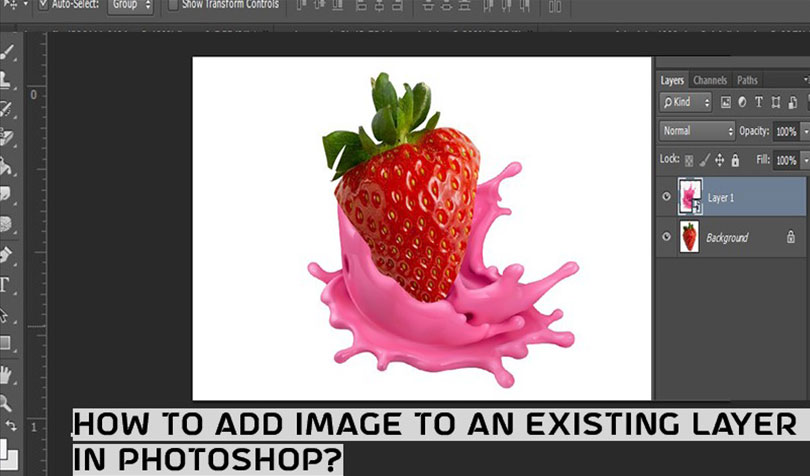
- Choose File> Embed space, Navigate to an image file in File Explorer or Finder, and click Location.
- Hold down the Shift key to avoid distortion of the image and drag the border corners of the image to resize the attached image.
- Drag within the border to be located to add where you want it
- Click the checkmark in the options bar to finalize the placement. This creates a new layer with automatically added images.
5. Unlock the background layer
Now you will be taught how to work at a special background level to convert a background and how to trim a layer into a regular layer.
- Note that the background layer is locked so it cannot be moved to the document window or rearranged in the layer panel and some editing functions will not work on it.
- To change the background layer to a regular level, click the lock icon to the right of the layer name in the Layers panel.
Mastering Layer Resizing in Photoshop: Advanced Tips for Precision and Control
Resizing layers in Photoshop goes beyond simply dragging a corner. For designers and retouchers who demand precision, understanding the advanced nuances of the Free Transform tool can dramatically improve your workflow and the quality of your output. This guide will delve into sophisticated resizing techniques, covering both Mac and Windows shortcuts and detailed step-by-step instructions.
The Foundation: Free Transform (Ctrl/Cmd + T)
The gateway to resizing any layer in Photoshop is the Free Transform command.
- Windows: Press
Ctrl + T - Mac: Press
Cmd + T
Once activated, a bounding box appears around your selected layer, along with a central reference point and transformation handles at the corners and midpoints.
Step-by-Step Advanced Resizing Techniques
Let’s break down how to achieve specific resizing outcomes with greater control.
1. Resizing with Aspect Ratio Lock (Proportional Scaling)
Maintaining a layer’s proportions is crucial to prevent distortion.
- Method 1 (Legacy Photoshop/Default in newer versions):
- Activate Free Transform (
Ctrl/Cmd + T). - Click and drag any corner handle.
- Hold down
Shiftwhile dragging. This locks the aspect ratio. - Release the mouse button, then release
Shift. - Press
Enter(Windows) orReturn(Mac) to commit.
- Activate Free Transform (
- Method 2 (Newer Photoshop versions – default behavior):
- Activate Free Transform (
Ctrl/Cmd + T). - Simply click and drag any corner handle. By default, newer Photoshop versions lock the aspect ratio.
- To temporarily unlock the aspect ratio, hold down
Shiftwhile dragging. - Press
Enter(Windows) orReturn(Mac) to commit.
- Activate Free Transform (
2. Resizing from the Center Outward
When you need a layer to scale symmetrically from its central point, this technique is invaluable.
- Steps:
- Activate Free Transform (
Ctrl/Cmd + T). - Click and drag any corner handle.
- Hold down
Alt(Windows) orOption(Mac) while dragging. This tells Photoshop to scale from the layer’s center point. - (Optional combined with aspect ratio) To scale from the center and maintain aspect ratio, hold down
Shift + Alt(Windows) orShift + Option(Mac) while dragging. - Release the mouse button, then release the modifier keys.
- Press
Enter(Windows) orReturn(Mac) to commit.
- Activate Free Transform (
3. Resizing with Numerical Precision
For exact dimensions, use the Options Bar at the top of the Photoshop interface when Free Transform is active.
- Steps:
- Activate Free Transform (
Ctrl/Cmd + T). - Look at the Options Bar. You’ll see “W” (Width) and “H” (Height) fields, usually expressed as percentages.
- To change the width, type a new percentage or pixel value into the “W” field.
- To change the height, type a new percentage or pixel value into the “H” field.
- Click the chain link icon between “W” and “H” to toggle aspect ratio lock. When linked, changing one value will automatically adjust the other proportionally.
- You can also type in specific pixel values (e.g.,
500px) if needed. - Press
Enter(Windows) orReturn(Mac) to commit.
- Activate Free Transform (
4. Setting a Custom Reference Point
By default, Free Transform scales around the layer’s center. You can change this.
- Steps:
- Activate Free Transform (
Ctrl/Cmd + T). - A reference point icon (a small crosshair target) will appear in the center of the bounding box.
- Click and drag this reference point to any of the corner or midpoint handles, or anywhere within or outside the bounding box.
- Now, when you scale, the transformation will pivot around this new reference point.
- Press
Enter(Windows) orReturn(Mac) to commit.
- Activate Free Transform (
5. Skewing and Distorting Layers
Beyond simple scaling, Free Transform allows for more complex manipulations.
- Skewing:
- Activate Free Transform (
Ctrl/Cmd + T). - Hold down
Ctrl(Windows) orCmd(Mac). - Click and drag a midpoint handle. This will skew the layer along one axis.
- Press
Enter(Windows) orReturn(Mac) to commit.
- Activate Free Transform (
- Distorting (Perspective/Free Transform):
- Activate Free Transform (
Ctrl/Cmd + T). - Hold down
Ctrl(Windows) orCmd(Mac). - Click and drag a corner handle. This allows for free distortion, where each corner can be moved independently.
- (For Perspective) Alternatively, with Free Transform active, Right-click (Windows) or Control-click (Mac) inside the bounding box and choose “Perspective” from the context menu. Now, dragging a corner handle will apply a perspective distortion.
- Press
Enter(Windows) orReturn(Mac) to commit.
- Activate Free Transform (
6. Smart Objects vs. Raster Layers
This is a critical advanced tip for preserving image quality.
- Raster Layers: When you resize a raster layer (e.g., a standard image layer) to be smaller and then try to scale it up again, Photoshop discards pixel information. This results in blurriness and pixelation.
- Smart Objects: To avoid this, convert your layer to a Smart Object before resizing.
- Right-click (Windows) or Control-click (Mac) on the layer in the Layers panel.
- Select “Convert to Smart Object.”
- Now, you can scale the Smart Object up and down multiple times without losing its original pixel data. This is because Photoshop stores the original image data internally.
Pro-Tips for Workflow Efficiency
- Commit Often: Don’t be afraid to commit a transformation (
Enter/Return) and then re-enter Free Transform for further adjustments. This can sometimes prevent complex transformations from becoming unwieldy. - Undo: Remember
Ctrl/Cmd + Zfor a single undo, orCtrl/Cmd + Alt/Option + Zfor multiple undos (History Panel). - Esc Key: Press
Escto cancel an active Free Transform operation without applying any changes. - Transform Again: After committing a transformation,
Shift + Ctrl/Cmd + T(Windows/Mac) will reapply the last transformation.Ctrl/Cmd + Alt/Option + Shift + Twill reapply it and create a duplicate of the layer, useful for repeating patterns or effects.
By integrating these advanced techniques into your Photoshop workflow, you’ll gain unparalleled control over layer resizing, ensuring crisp, professional results every time. Practice these methods, and they’ll quickly become second nature,
If you follow these 5 Photoshop tutorials, you can easily understand how to resize a layer in Photoshop. Any eCommerce Photo editing company always focuses their product in different shapes and sizes for the customer’s eye through Clipping Path company.
We are one of the best Clipping Path companies to provide these types of services. So now that you know how to resize a layer of Photoshop image editing perfection, you should probably learn some more useful tricks to improve your workflow. If you want to learn more details, we think our website’s content will help you.
To enhance your skills, you can check out our links below for your apprenticeship or professional work as it will provide the best support for you.
You will also find new content on our site, which will greatly assist you in your professional work. You can explore any type of work trial through us if you’re interested.