Having a perfect smile makes portraits stand out—whether it’s for fashion photography, weddings, e-commerce models, or social media influencers. However, even the best photos often need a little editing to brighten up teeth naturally. That’s where Photoshop comes in. In this blog, we’ll show you how to whiten teeth in Photoshop step by step for both Mac and Windows users, explain the Photoshop tools in detail, and also discuss the outsourcing costs if you want professionals to handle the job in the USA or Bangladesh.
Table of Contents
Why Teeth Whitening in Photoshop Matters
-
Natural Beauty: Enhances portrait photography by giving a clean, bright smile.
-
Professional Quality: Fashion and corporate headshots look polished.
-
E-Commerce Impact: Model photos look more appealing, directly influencing customer trust.
-
Social Media Growth: Influencers often rely on subtle photo retouching for engagement.
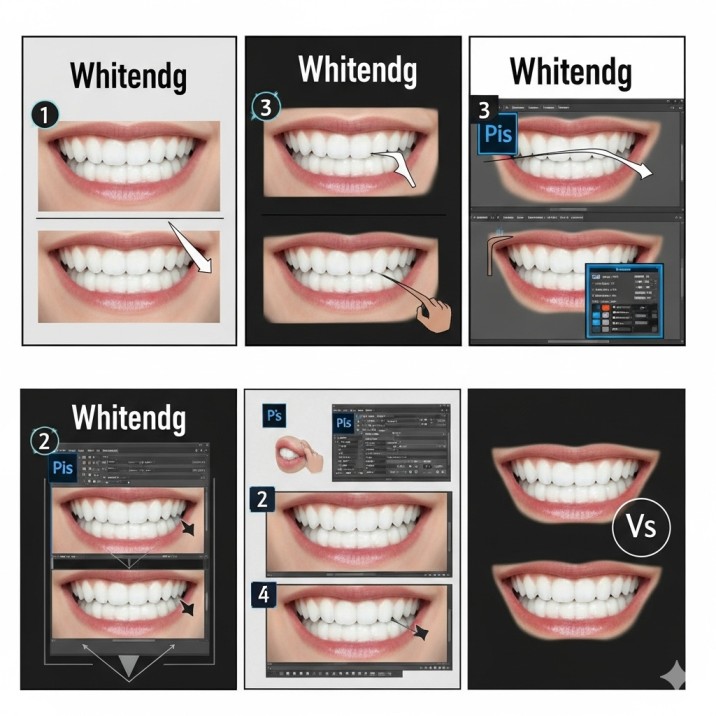
How to Whiten Teeth in Photoshop – Step-by-Step
Below are the steps that work both on Mac and Windows (with slight shortcut differences).
Step 1: Open Your Image
-
Go to File > Open and choose your portrait photo.
-
On Mac: Use shortcut Command + O.
-
On Windows: Use shortcut Ctrl + O.
Step 2: Zoom In
-
To focus on the teeth area, zoom into the mouth.
-
Mac: Command + Plus (+)
-
Windows: Ctrl + Plus (+)
This makes it easier to see details and avoid editing other parts of the face.
Step 3: Select the Teeth
Use the Lasso Tool or Quick Selection Tool to carefully select only the teeth.
-
Shortcut: L (Lasso Tool)
-
Shortcut: W (Quick Selection Tool)
💡 Pro Tip: Avoid including gums or lips, otherwise they will look unnatural after whitening.
Step 4: Create an Adjustment Layer
-
Go to Layer > New Adjustment Layer > Hue/Saturation.
-
In the properties panel, click the hand icon and select the yellow tones (since teeth discoloration is mostly yellow).
Step 5: Reduce Yellow & Increase Brightness
-
Saturation Slider: Drag left to reduce yellowness.
-
Lightness Slider: Increase slightly to brighten teeth.
💡 Make sure not to overdo it, or the teeth will look fake.
Step 6: Fine-Tune with Brush Mask
-
Select the Layer Mask of the Hue/Saturation layer.
-
Use a Soft Round Brush (Shortcut: B).
-
Paint with black on areas where whitening spilled outside the teeth.
This keeps gums and lips untouched while focusing only on teeth.
Step 7: Optional – Dodge Tool for Shine
-
Select Dodge Tool (Shortcut: O).
-
Set Range: Midtones, Exposure: 10-15%.
-
Brush gently over the teeth to add natural shine.
Advanced Step-by-Step Guide: How to Whiten Teeth in Photoshop
Step 1: Open Your Image Open the image you want to edit in Photoshop. It’s a good practice to duplicate your background layer (Cmd/Ctrl + J) to work non-destructively, so you can always revert to the original if needed.
Step 2: Create a Selection of the Teeth Use a selection tool like the Lasso Tool (L) or the Pen Tool (P) to carefully outline the teeth. You don’t have to be perfectly precise at this stage, as you will refine the selection later.
Step 3: Add a Hue/Saturation Adjustment Layer With your selection still active, click the New Fill or Adjustment Layer icon (a half-filled circle) at the bottom of the Layers panel and choose Hue/Saturation. This will automatically create a Layer Mask from your selection, applying the adjustment only to the teeth.
Step 4: Target the Yellows In the Hue/Saturation Properties panel, click on the Master dropdown menu and select Yellows. This ensures that you only adjust the yellow tones in the image, which are the main cause of discoloration in teeth.
Step 5: Reduce Saturation Drag the Saturation slider to the left to desaturate the yellow. Be careful not to go too far, as this can make the teeth look gray and unnatural. A value of around -50 to -80 is a good starting point, but it will depend on your specific image.
Step 6: Increase Lightness With the Yellows channel still selected, drag the Lightness slider slightly to the right to brighten the teeth. Again, be subtle here to avoid an overly bright or fake appearance.
Step 7: Refine the Layer Mask Now, you can refine your selection to make sure the effect is only on the teeth.
- Select the Layer Mask thumbnail (the black and white rectangle) of your Hue/Saturation layer.
- Select the Brush Tool (B).
- Set your foreground color to Black (press D on your keyboard to reset colors, then X to switch).
- With a soft-edged brush, paint over any areas where the whitening effect has spilled onto the gums, lips, or skin. Painting with black on a layer mask hides the effect.
- If you accidentally paint over a tooth, switch your foreground color to White (press X) and paint over it to reveal the effect again.
Step 8: Final Adjustments If you feel the overall effect is too strong, you can lower the Opacity of the Hue/Saturation layer in the Layers panel to blend it more naturally with the rest of the image.
This method gives you precise control and a non-destructive workflow, ensuring you can go back and make changes at any time.
Photoshop Tools Used in Teeth Whitening
-
Quick Selection Tool (W) – For precise selection of teeth.
-
Hue/Saturation Adjustment Layer – Main tool for whitening.
-
Brush Tool (B) – To refine edges on masks.
-
Dodge Tool (O) – To add shine and light.
-
Zoom Tool (Z) – For detailed view while working.
Shortcuts for Mac vs Windows
| Action | Mac Shortcut | Windows Shortcut |
|---|---|---|
| Open File | Command + O | Ctrl + O |
| Zoom In | Command + + | Ctrl + + |
| Zoom Out | Command + – | Ctrl + – |
| Save | Command + S | Ctrl + S |
| Undo | Command + Z | Ctrl + Z |
Outsourcing Teeth Whitening: Cost Breakdown
If you don’t want to do it yourself, outsourcing to professional photo editors is a great option. Here’s what it costs:
📍 USA Photo Editors
-
Per Image: $5 – $15
-
Bulk Orders: $200 – $500 per batch (depending on complexity)
-
Pros: High-end quality, fast turnaround.
-
Cons: Very expensive for bulk editing.
📍 Bangladesh Photo Editors
-
Per Image: $1 – $3
-
Bulk Orders: $50 – $100 per batch (50+ photos)
-
Pros: Affordable, skilled editors, 24-hour delivery common.
-
Cons: Quality varies; you must pick a trusted company.
💡 If you run an e-commerce store, Bangladesh editors are cost-effective, especially for large product batches. Many agencies (like clipping path services) have 30+ in-house editors working round the clock.
How Long Does Teeth Whitening Take in Photoshop?
-
Beginner: 10–15 minutes per photo.
-
Professional: 3–5 minutes per photo.
-
Bulk Outsourcing: 24–48 hours for 500+ photos.
Final Tips for Natural Whitening
-
Always zoom out after editing to check natural look.
-
Avoid making teeth pure white (#FFFFFF) – it looks fake.
-
Use adjustment layers instead of destructive edits, so you can always revert back.
-
For batch editing, create Photoshop Actions to save time.
Conclusion
Learning how to whiten teeth in Photoshop is one of the most useful retouching skills for photographers, designers, and digital marketers. With the right tools like Hue/Saturation layers, Dodge Tool, and careful masking, you can brighten teeth naturally without making them look artificial.
For professional projects or large photo batches, outsourcing can save time and money. While USA editors provide premium service at higher rates, Bangladesh editors offer high-quality, affordable solutions—making them a popular choice for e-commerce businesses worldwide.
Whether you’re a Mac or Windows user, these steps will help you achieve that perfect smile in every photo.