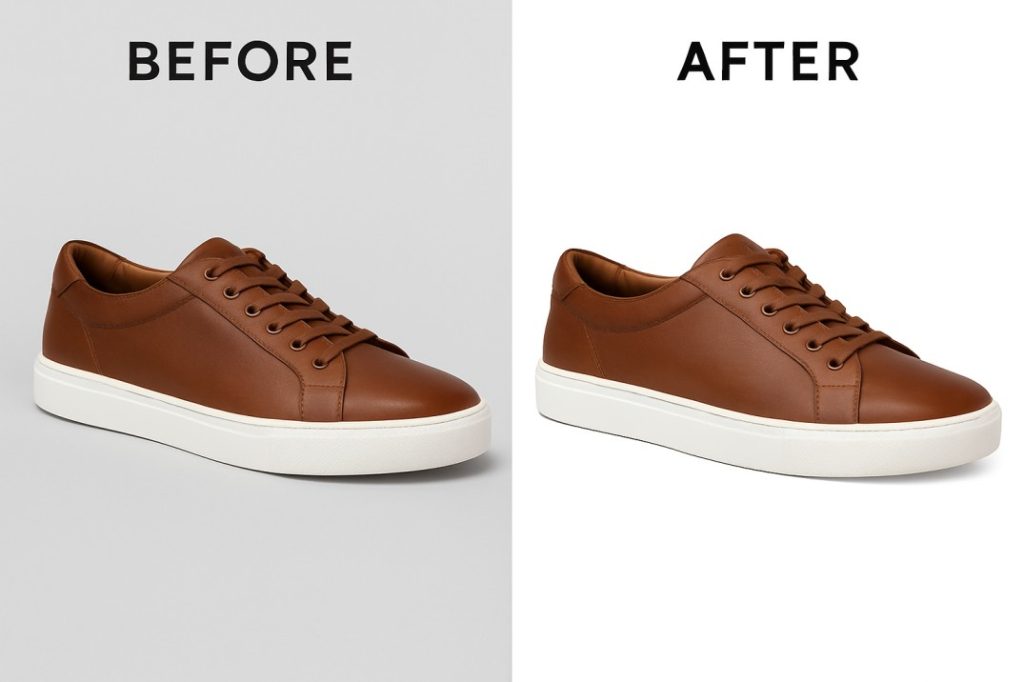
Clipping mask Photoshop shows different level parts and can hide and fit images into shapes. Through this content, we will show you the basics of making a clipping mask and teach you how to explore the concept behind them in more detail to understand how to work with covers at the end of this lesson. We will use Photoshop but keep in mind that not everything is fully compatible with Photoshop CS. Let’s them for the benefit of your professional life.
Notice that it allows you to use layer material to mask its upper layers. You will see that the bottom part or base layer content determines the masking. Here the layers of the clipping mask reveal the non-transparent part of the clip on the contents of the layers above it. All other contents of the clipped layers are masked.
Table of Contents
How does a clipping mask work with Photoshop 2021?
First, we want to teach you what a clipping mask is in Photoshop 2021.
A professional photographer uses Photoshop masks as a compelling way to control a level of visibility. This means that masks are made like layer masks. However, if you notice, you will see that the result may look the same, but the clipping and layer masks will be very different in Photoshop.
Masks are formed from one layer to another in these layers to apply a mask. A clipping mask cuts and paste shapes, sizes, and patterns from one sheet to another. It should be done in such a way that you have cut out the images, and it looks like you have stuck them on another piece of paper.
Remember that to create it, and you need to make at least two layers. Notice we can place it at the lowest level below the image if we want. And multiple layers can be added to create it, and you can create numerous clipping masks in one file. Photoshop has many features that you can use to enhance the images that you want to enrich your professional work. This is why a masking service is a handy feature.
If you learn it well, you will find it very easy to learn how to create it in Photoshop, and you can create your new frames for images, beautiful typography, or custom photo formats.
Rules for creating clipping masks in Photoshop
We have already discussed with you about the masking service. Now, we will show you step by step how to create incredible artwork by creating it in Photoshop.
If we show it, you will understand that this process is straightforward. Even newcomers to learning it will be able to create it for professionals like Photoshop in no time.
First, you provide features with a “Create Clipping Mask” in the Photoshop Layers panel. When you click on this option, any layer will be converted into a layer clipping mask placed below it.
But before you create it, you have to level the image and select a specific area just below the level.
Step 1: Select & open the image
Now open or create a mask in Adobe Photoshop just the way you would. You will then see that the cover has automatically created a background layer for the image just as you wanted. To do this, first, notice the background layer. It will be locked. So now you need to unlock it.
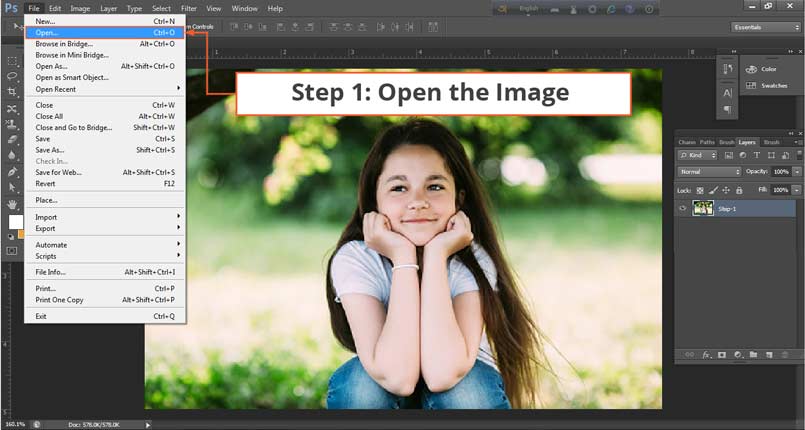
Now unlock the background layer that you created by following the instructions correctly.
Now you need to change the name of the layer. You can do this without altering your name, but you can do it under another name. You will then see that the coating is converted to “level 0” by default. If necessary, change the name of the layer after your convenience. However, the title should be kept as it is. Now unlock the background layer by clicking on the lock icon. You will then see that the coating is converted to “level 0” by default. You can change the name of the layer if you wish. However, the title should be kept as it is.
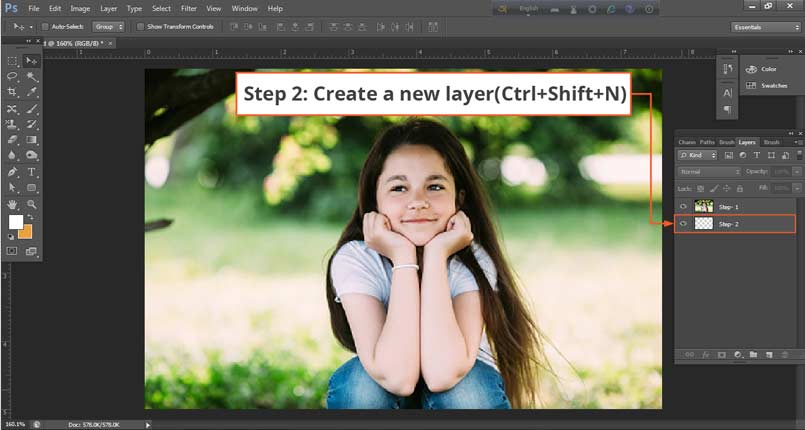
Step 2: Create a new level in the second step
You need to create a new layer from the bottom of your excavated layer panel. A new layer will be made when you click on the icon. When you create layer 1, you need to drag level 0 to that icon to create it. Then you have to put level 0 above level 1; then, it will be made.
Step 3: Select one of the third steps
Here first, make a selection to create masking. With the selected layer from the Layers panel (With setting Layer 1), select a region on the image and use the available selection tools. You can use any selection tool for this if required.
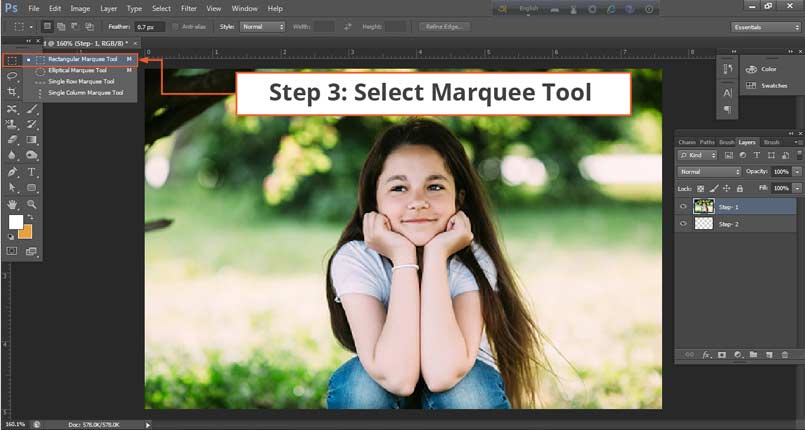
This selection tool will help you determine its size and shape when you go to create it. Here please use the rectangular marquee tool.
Step 4: Fill in the selection in step four
In Step fou, all you have to do is select the part you want to make the mask from the photo.
Then hide the level written 0 by clicking on the visibility icon. Now you can easily see your selection from level 1 you created.
Now we need to use the selected region to Create it so that we can save our selection even if it is not set. As a result, we can fill in some parts of the area with color or pattern.
Please enter the edit menu now; you need to select the color and fill the layer with any color or design of your choice.
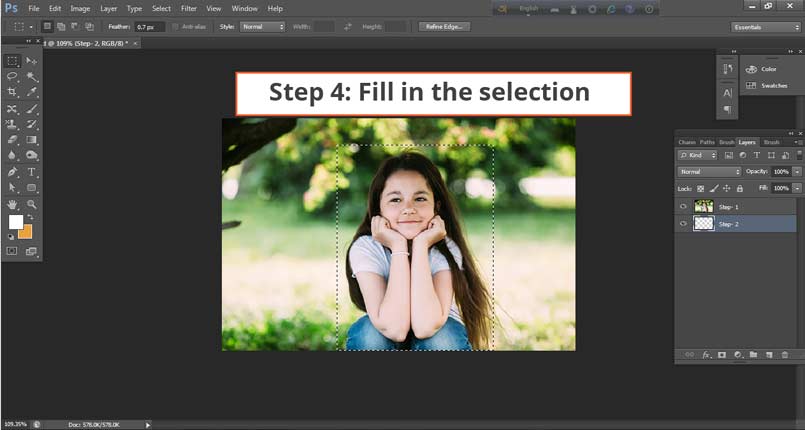
Now you need to select a color. If the color is black, then it is better. Now fill that layer with black paint. You will find that it helps you to see even after you have made your selection. Your selected area will now look exactly like the image you see below.
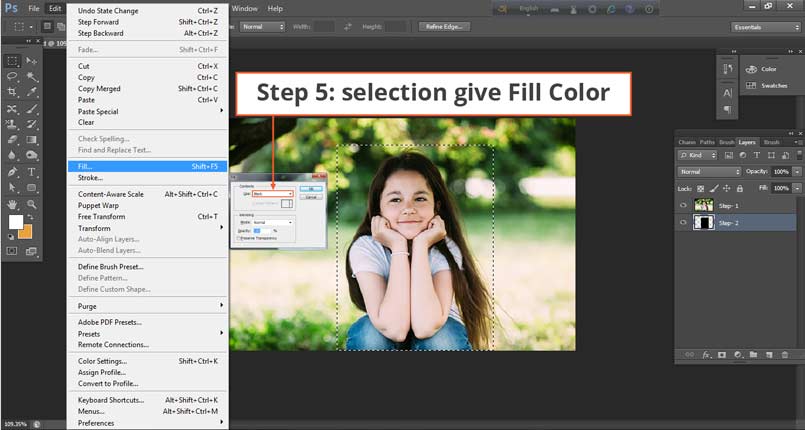
Step 5: Not selected in State Five
Once you have filled in your selected area, you can uncheck the level at any time. To do this, click on the Select menu now and select the click to deselect the option.
Now, all we have to do is select a color, and the color of that selection should be black. Now we will complete the assignment in black. You will find that it helps you to see even after you have made your selection. Your selected area will now look exactly like the image you see below.
Step 6: Select Masking
In this step, you need to create a Photoshop Photo masking service and go back to layer 0 to create it. Select level 0 now. It would be best if you made level 0 visible with the visibility icon. By selecting level 0, go to the level option from the options bar. Then select the Masking option to create a clipping mask. You can also do this with shortcuts such as Alt + Ctrl + G or go directly to the level option and select the cover.
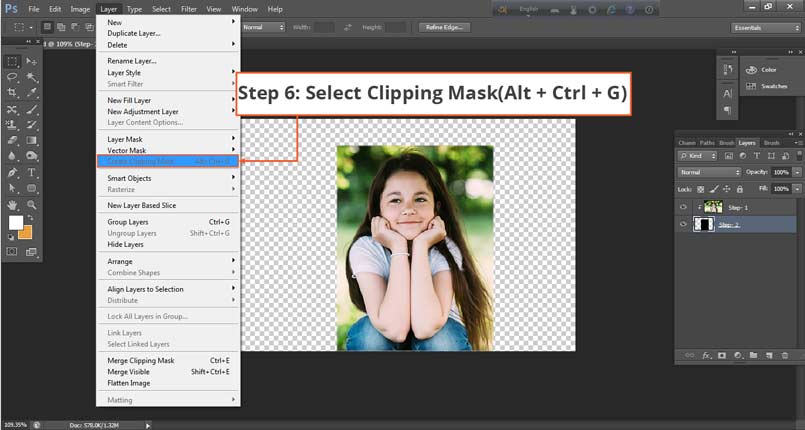
Keep in mind that there are easy and other ways to create it, such as holding down the Alt key and then moving the cursor between the two layers. when the cursor changes, You will see that clicking on the option to create a Photoshop masking service will make the clipping mask.
Once all the procedures will do, the initial stage of the clipping mask will begin. We have given a picture below, just like the picture it should look like now.
Here is the image for the background at level 1. You can move and drag the image at any time to adjust the mask for your convenience. You can now select the move tool by selecting level 0.
Finally, you will see that you have created a Photoshop clipping mask. But yes, you can do a lot with photo masking. When you need to generate typography or frame, you can easily create it with the help of Photoshop tools. If necessary, you can also change the background of the photo to facilitate your work.
In addition to Photoshop Clipping Month, let’s show you some tips on how to change the background of an image with the mask of Clipping in Photoshop.
How to Changing background with Photoshop making tools
The image we are using here is of a person standing on top of a hill and taking a picture of another mountain and attaching a new person to it. By changing the person’s background to blend him well into the image, I have to pick the person and apply the combinations.
But let’s show you how to start the process
Step 1:
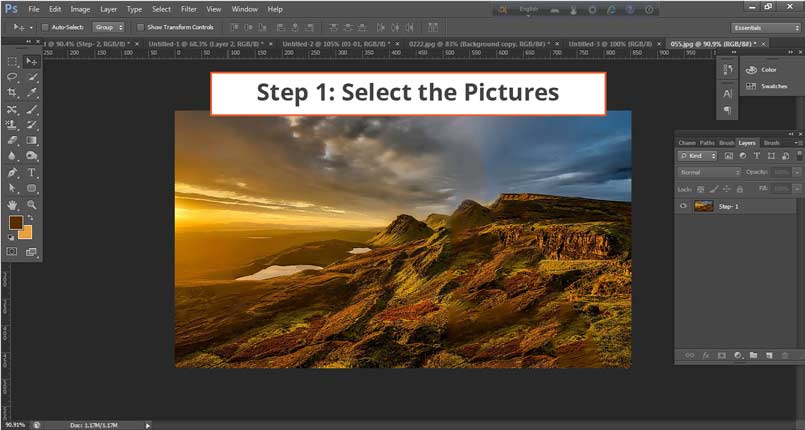
First, we will select two pictures to Change the background with Photoshop tools & its Photoshop shortcut.
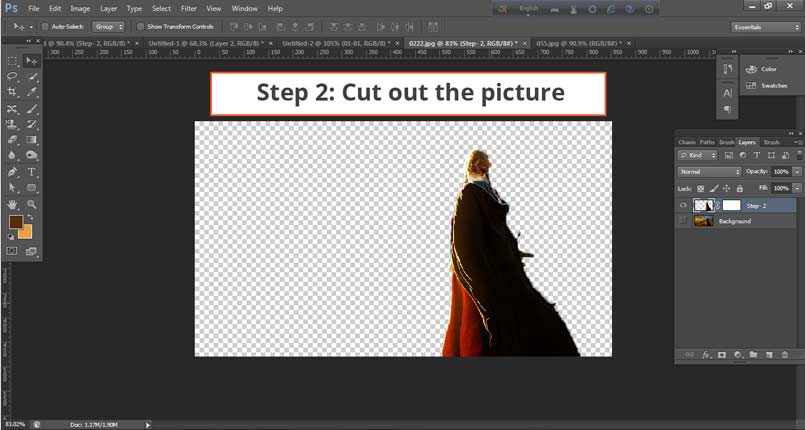
Step 2:
The first thing, we will do now. It will cut out the image of that person from the second image. All we can do here is use a standard Photoshop layer mask to keep that person visible.
Step 3:
After hoping to cut the image, we will now put it in the landscape image. What we’ve we’ve done here is grab the person’s level and drag it into another document, and put it down.

Step 4:
Notice that the person now has a problem after a place in a new frame. Look at the picture; the landscape tones don’t go with it at all. Now we have to adjust the color and brightness of the image. We will now create a color balance adjustment layer for this and set the correct values so that the problem is not fully The understanding.

To do this, we will clip the adjustment level at the bottom of the line by pressing Alt to adjust the image.
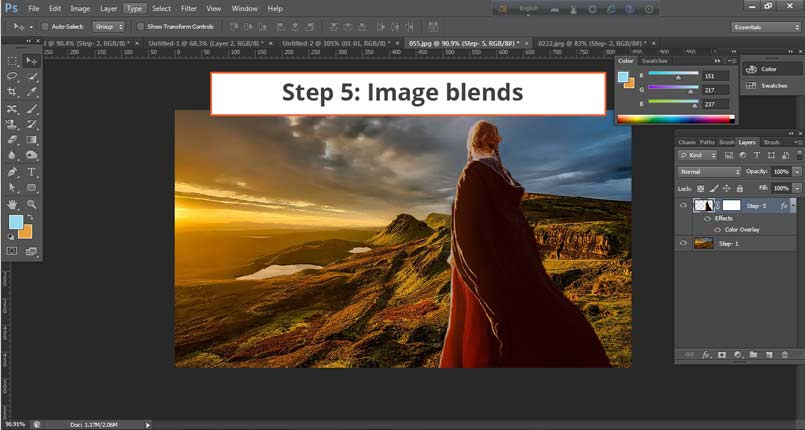
Step 5:
We can now create stack masks if we want. So, we can blend the image more into the landscape image to give it a slightly darker coating. Notice that the lower part of the body of the image still looks very bright. We will now also add extra gradual darkening so that the brightness can not see in the image blends perfectly.
Conclusion
Keep in mind that creating a clipping path or mask service can match one image with another. In addition to background removal and typography here, you can do much more with different shapes if you want. Photolixa creates a condition in the core process for creating

Photo masking in their work that you can see and understand why our team is adept at cutting the top layer. With the help of our other containers, like Photo Masking Services, you can enhance your experience because we can learn how to play with images using masking service.
If you wish, you can access our other advanced photo editing services by entering the link below. Because we think, Photoshop masking service is an incredible process in photo editing. It considers the best and most straightforward technique in Photoshop. If you have any further questions about Photoshop Photo Masking and clipping path, please let us know to send an email to: info@photolixa.com.


